Dried Wedding Flower Ornament

Happy Holidays everyone! I have a really easy but special DIY for this Season. And of course they don’t have to be from a wedding bouquet but these are from my wedding which was last June.

I wanted to preserve a bit of my flowers but I don’t want them in a shadow box because I had hydrangeas and things with tiny parts that would just fall apart anyway.

I don’t know how many years they will keep but they should last at least a few years.

All you need is some clear glass ornaments and dried petals and leaves. Be careful when placing everything in the ornaments because they are very thin glass and you don’t want it to break and cut you. It’s that easy! If you don’t celebrate Christmas and/or have a tree they would look great handing from ribbon in a window or from a shelf also.

I added some of my wedding pictures also, since I realized I never shared them on here last summer.

Have an amazing holiday season!

Advertisement

Crockpot Applesauce

dsc_0080

Hey, have you missed me? I’ve been trying to get the motivation to write a post, even thought it really doesn’t take that much time at all.  Sometimes when I  have a million other little things to do, I put things off even the things I enjoy doing.  Since I graduated in July, I have been busy wedding planning, job searching and taking care of some sick family members in Indiana, so needless to say I’ve been busy.

I’m posting this recipe for multiple reasons.  One, its super easy, two its healthy, and three it’s so easy I can’t believe I’ve never made it before!

I love anything that I can throw in a crockpot while I do other things.  Bonus: it smells amazing!

Here is what you need:

  • 6-8 Apples, diced (with or without skins)
  • 1/2 cup water
  • 1 tsp. cinnamon

Add all ingredients to the crockpot and cook on high for 2 hours or low for 4 hours.  I chose to leave the skins on my apples for fiber, but if you do this I would recommend blending it in small portions in a blender.  If not, and especially if you like it chunky like I do I would just use a hand masher.  I did this and while it was good, the skins were a little much.

dsc_0069

I got the original recipe from The Healthy Maven Blog and tweaked it a bit to fit my preferences and crockpot size.  Homemade applesauce is tastier than store bought and so cheap and easy to make, it would be a great healthy snack for kids.  I love it because its a sweet snack with no added sugar.

Enjoy!

img_3719


Christmas DIY Roundup

Hey all, remember me? Ah I just realized I haven’t posted since October!  The reason being grad school is keeping me super busy.  But even though I have been working on my art more than crafts I still want to spread some holiday cheer so I found a couple of my favorite diy’s I posted last Christmas time for a little refresher.

First there are these super fun and easy to make Snow Globes

DSC_0076


Next the ever amazing Dyed Bottle Brush Trees and Wreath

DSC_0015

And last but not least…Clay Paw Print Ornaments

DSC_0023

I hope these give you some inspiration and fun and I’d love to see what other Christmas diy’s you come up with so show me on Instagram with #peppermintsandhoneybees.  Also I have an exciting announcement to make soon so stay tuned!!!

IMG_3719

Concrete Pumpkin

DSC_0054

Happy Halloween!  Halloween is my favorite holiday and I have one more pumpkin diy to share. I wanted to make this last Halloween but just ran out of time so it was definitely on my list this year.  The Concrete Easter Eggs were my first experience with concrete and it was pretty easy so I was pretty excited.  Also I did some research and I guess cement and concrete are not the same.  Cement is  an ingredient of concrete. Concrete is a mixture of aggregates and paste. So Concrete is stronger and will last much longer.  The original idea is on the blog Fox Hollow Cottage.

DSC_0013

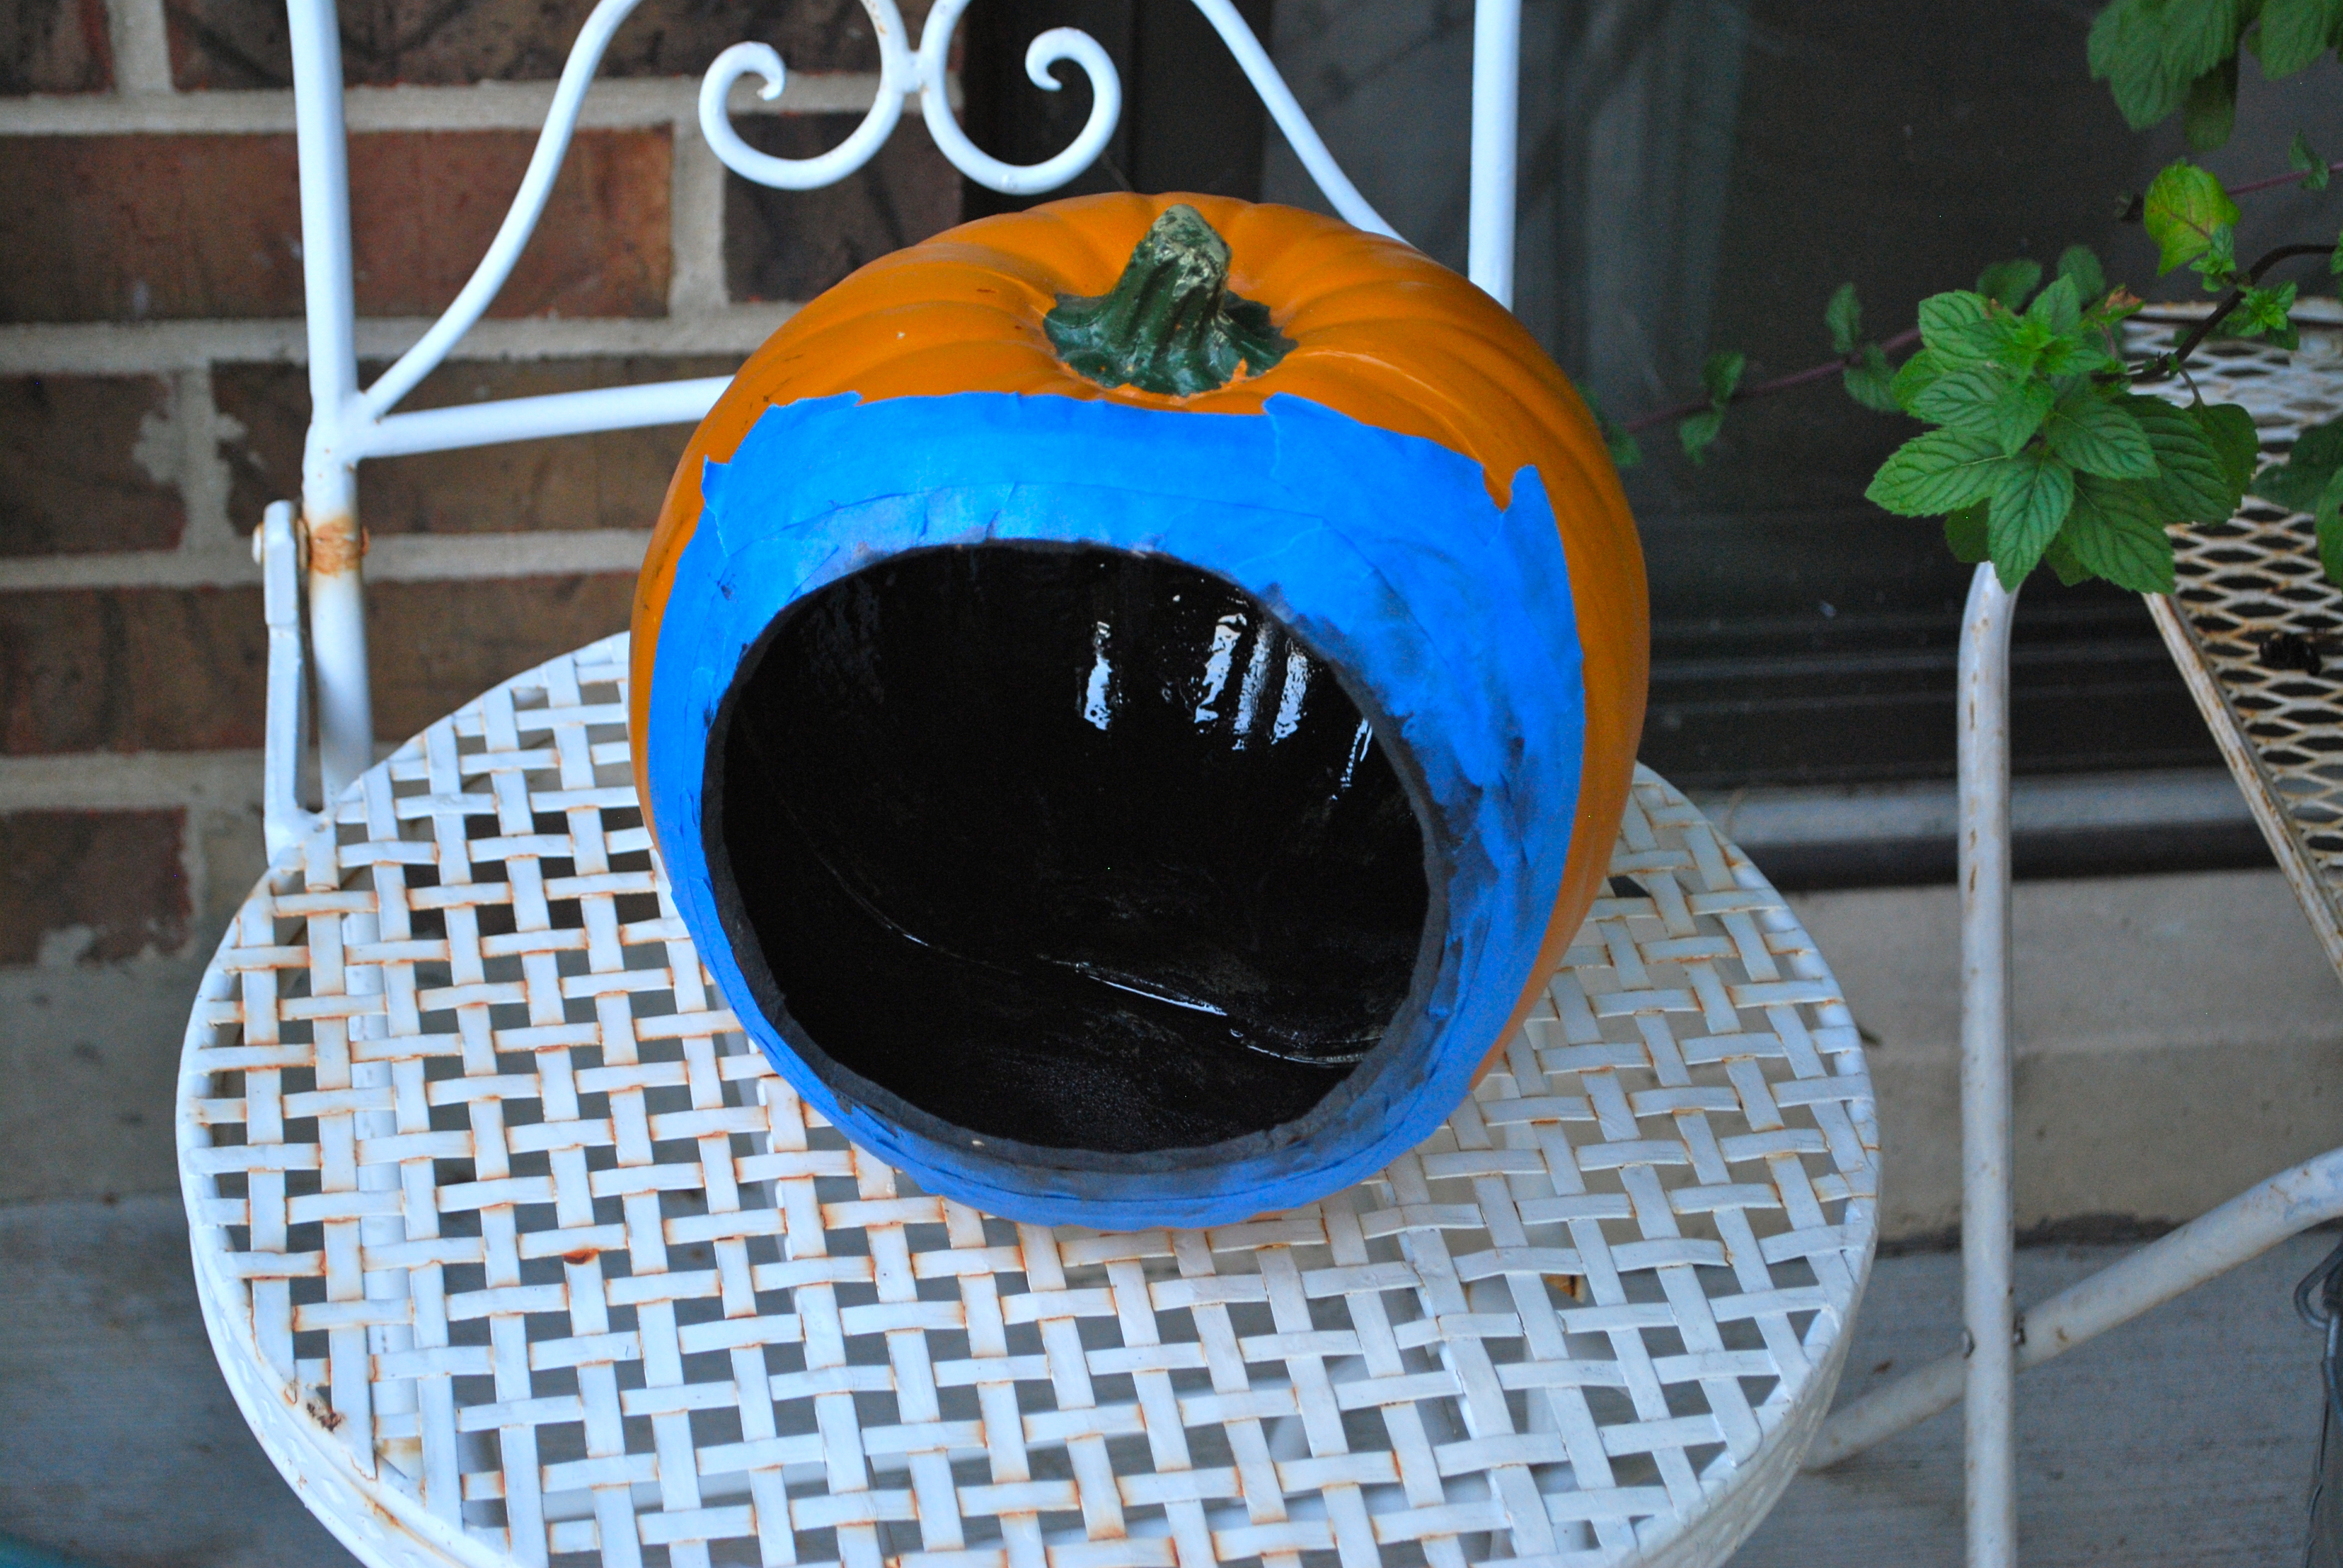
First cut a hole and and design you want on the pumpkin with a knife. This one was a light I got at Goodwill so it already had a face and a hole in the bottom.

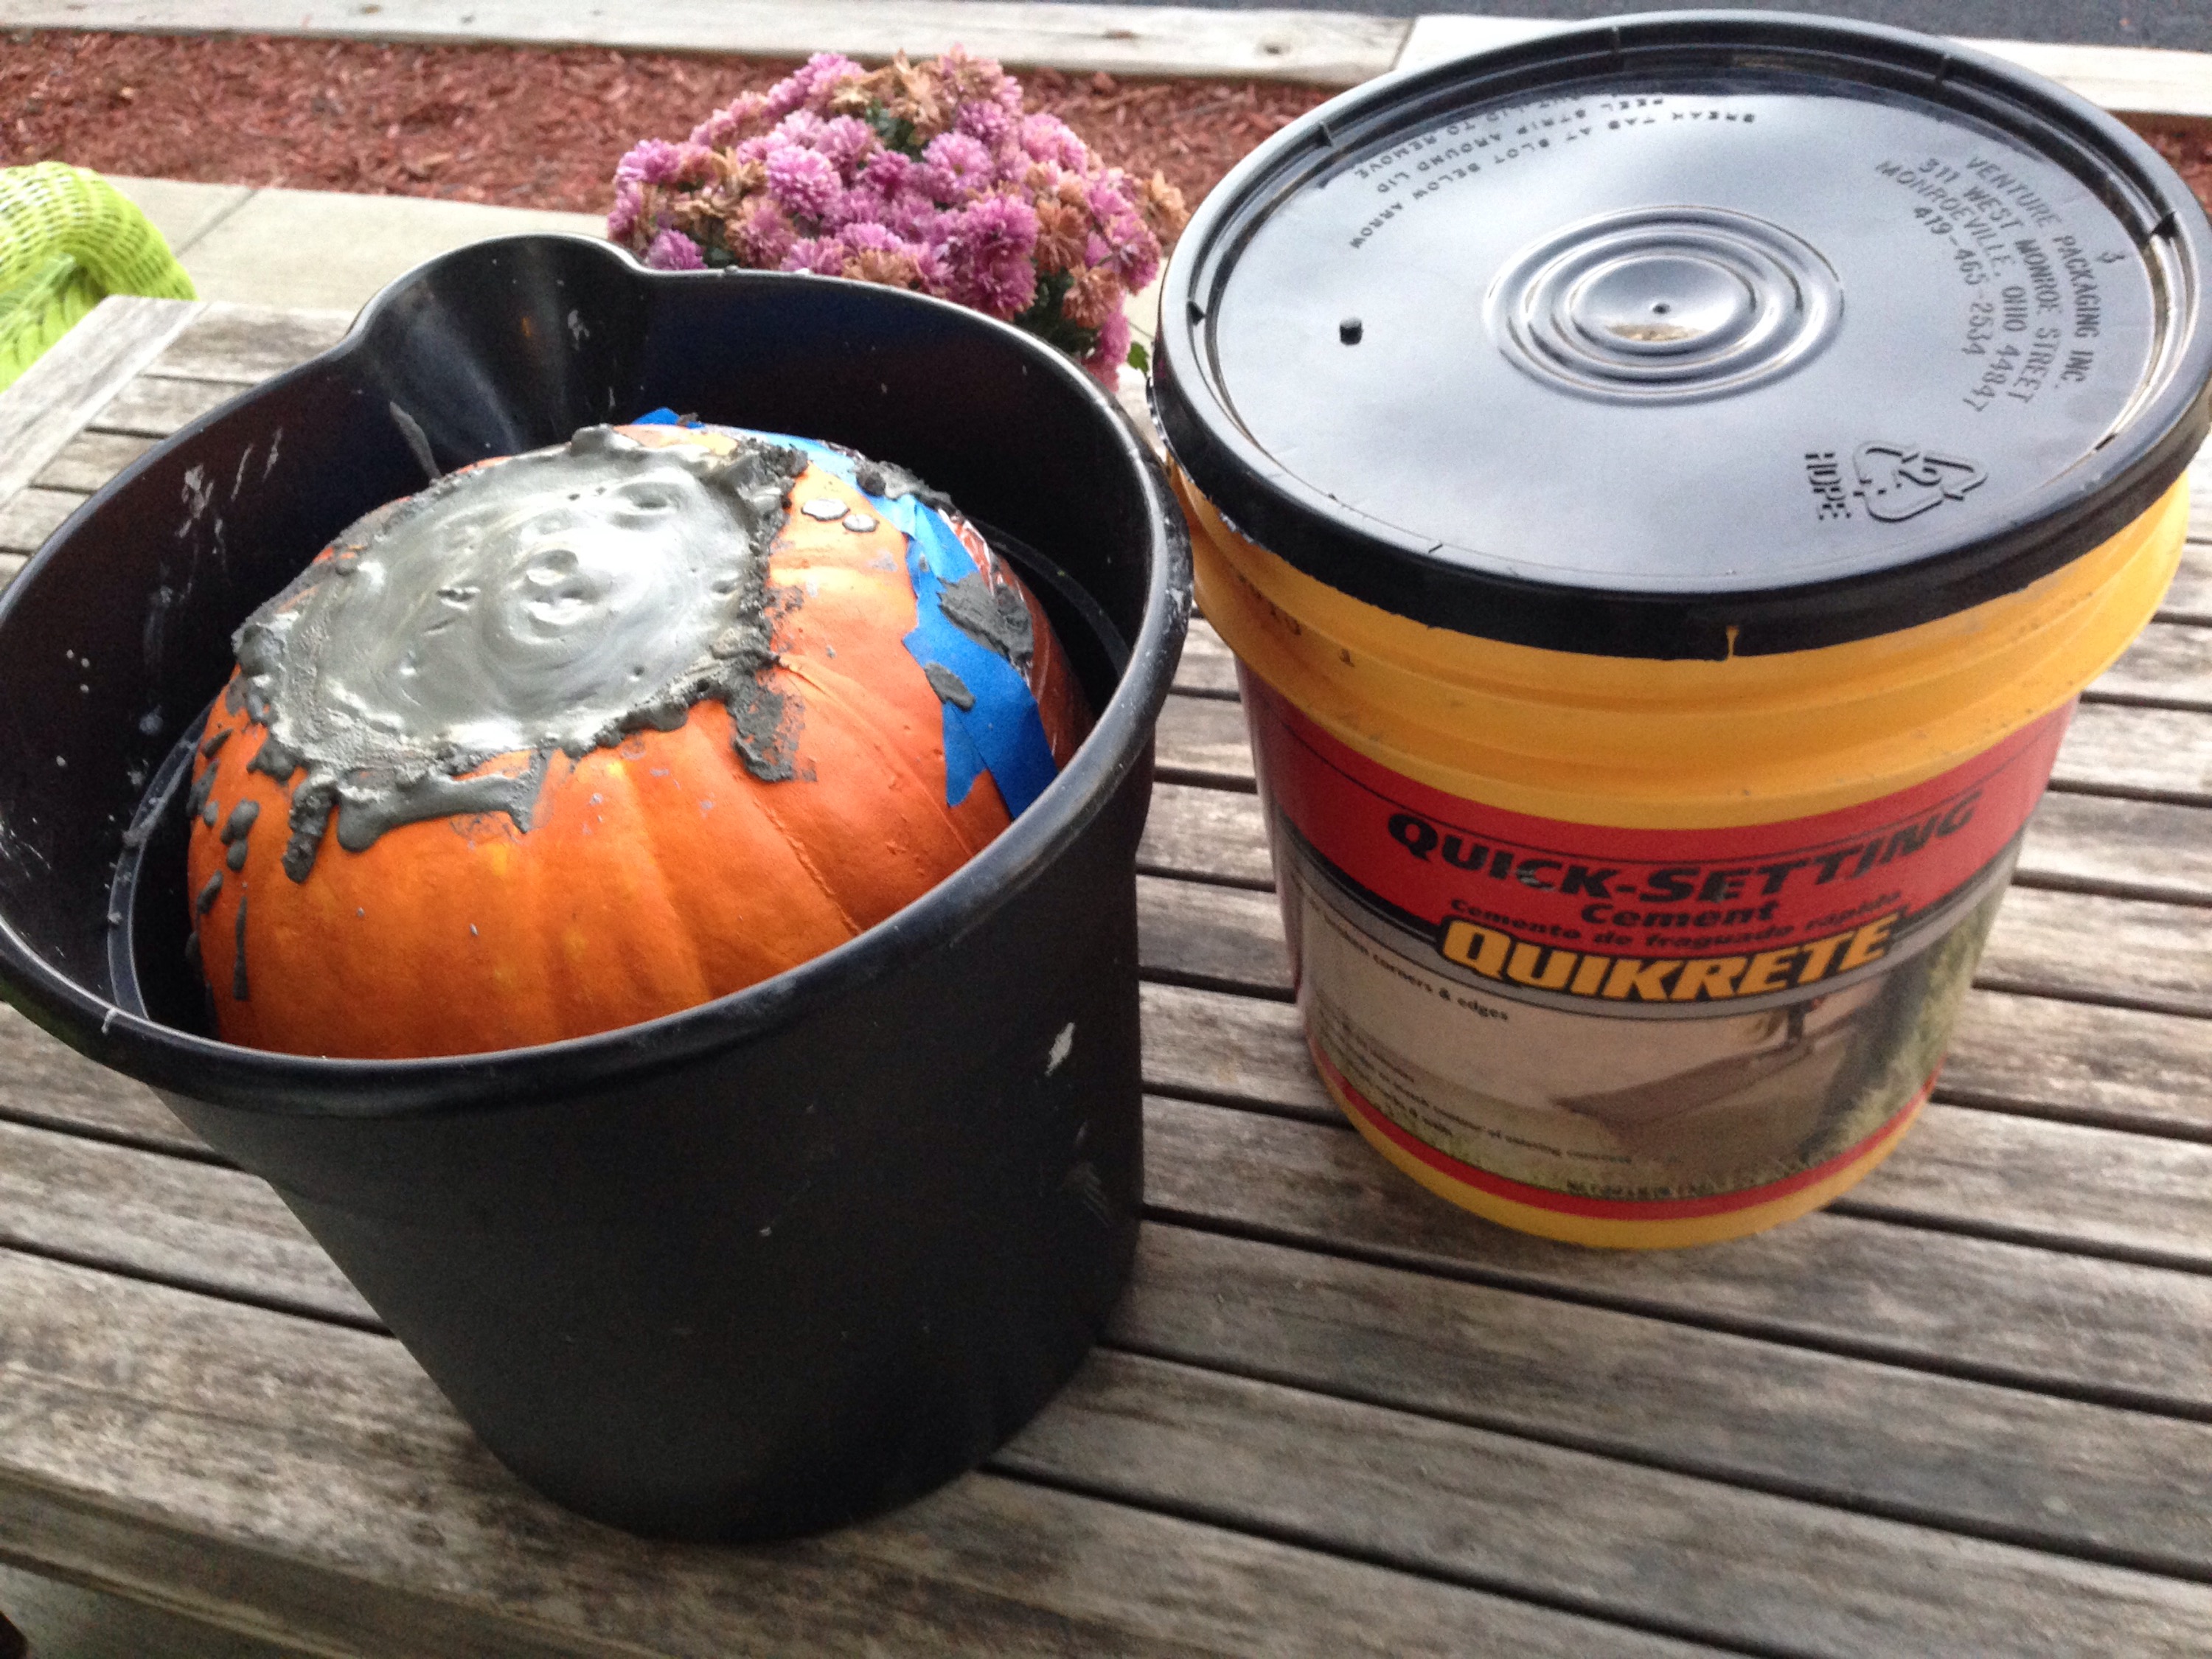
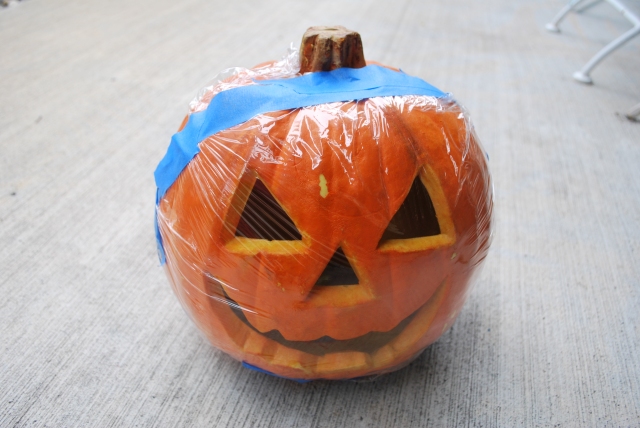
Next put plastic wrap tightly around the face so the concrete won’t leak out. Turn in upside down and spray the inside with cooking spray. I forgot this stepsons mines isn’t stick too bad but I would recommend using spray. I put my pumpkin I. A bucket to get it to stay upside down while I poured the concrete in. The concrete I used was Quikrete from Home Depot.  

  If you’ve never mixed concrete it’s pretty easy. Some people add the powder to the water, I like to add water gradually to the powder while I stir. Only add a little water at a time until you get an even and thick but pourable consistency.

Let the pumpkin sit for at least 24 hours after you pour the concrete.

When you cut the foam pumpkin off use a knife, scissors, and a screw driver came in handy for prying pieces off.

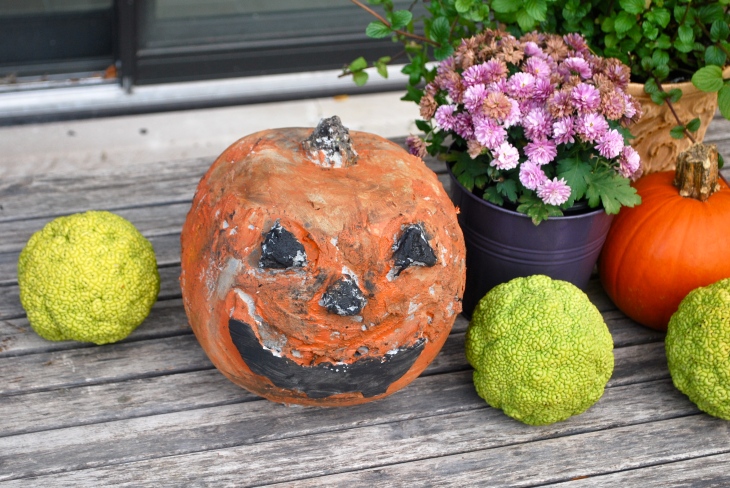
When I took my pumpkin off the eyes and eyes didn’t fill in all the way so I mixed some more concrete up in a cup and speckle some on to make them bigger and more triangular. It doesn’t have to be perfect though. The cracks and rough spots are what makes the concrete pumpkin interesting!

DSC_0056

Show me your costumes in Instagram by using #peppermintsandhoneybees. Now go get your spook on!

Pumpkin Terrarium

DSC_0019

When I was in elementary school I always secretly loved projects where I got to make dioramas. I’ve always loved miniatures and love making little scenes. So when I found some pictures on Pinterest here and here that combined my love of dioramas with my love for Halloween I knew what I had to do!  I found the foam pumpkin at Goodwill. Someone had tried to carve what sort of looked like a castle and gave up so I buggy it and just cut a big hole out where they had started carving. Of course you can just by a new foam pumpkin from any craft store in the fall. Just make sure it’s the hallow carve-able kind!

I chose to spray paint the inside black as shown below but it’s totally up to you what you want the inside to look like.

DSC_0389

I used rocks, sticks and different kinds of moss for the terrarium.  The moon and stars are glow-in-the-dark stickers and the fox is a little figurine from Joann’s.  Finding things to put in is half the fun!  I’m still on the hunt for very tiny battery powered led string lights that I can attach the the top inside to shine light down on my scene.  It’ll be fun to switch things around every year.  Now get to crafting!

IMG_3719

DSC_0018

Lace T-shirt Redo

Hello all I hope your are enjoying the beginnings of fall!  Sorry for the long absence.  As you may or may not know, I started grad school At Columbia College in Chicago and to say that it is taking up most of my time would be an understatement!  So…if my posts are far and few between lately you will know why.  No fear though, I’m still here and still blogging, I just don’t have as much free time to diy.  Any ways I have this t-shirt DIY that I actually made quite a while ago and just never got around to posting.  It’s quite simple if you have a sewing machine and a shirt you don’t mind ripping apart.  I got the idea from this awesome diy blog Trash to Couture.

DSC_0014

All you need is:

  • a t-shirt
  • seam ripper
  • sewing machine plus pins, scissors etc.
  • lace or crocheted trim.  (Mine is from Joanne’s Fabric)

First cut the very edge off of the sides of the shirt including the sleeves.  Don’t cut too deep, you want your shirt to still cover you.  measure out how much trim you will need before you but it.  Mine took about 3′ for both sides.  you want to lay the open shirt out and measure from the bottom of the front to the bottom of the back.  after you buy your trim pin in onto the shirt edge and sew it in place.

DSC_0021

Next you want to sew the front and back together again but remember to leave a whole for your arm.  I would leave a good sized hole so the shirt flows. And there you go!DSC_0022

IMG_3719

Painted Shirt 

DSC_0275

I used my Portland vacation for my photos. 😉 I’ll post the rest next.

I had an idea for a graphic shirt without screen printing. (although I’ve been wanting to try screen printing)  I used a white tank top and used a plastic bag over cardboard to paint on.  I used watered down craft paint, but only water it down slightly because it will run.  This is also why you should keep your imagery simple.  I love the way it turned out and what says Summer better than watermelon!

IMG_3719

I should mention that I didn’t actually paint on the carpet, and I wouldn’t recommend it!

 DSC_0286

Bird Feeder Save 

Last Fall I may have gotten into a minor turf war with one of the squirrels that was stealing bird food. They were good all summer and only ate what the birds dropped but then they got greedy ad found out they could crawl up the brick wall to get to the feeder. After I slapped one on the tail when he didn’t leave I came home the next day to this. 

 Yup, that’s all from one day. This was personal! 

Anyway I really didn’t want o have to throw out the feeder and tried to still use it but the bird seed would spill out when the birds sat on it. I got the idea to glue a plate into the bottom to catch what was spilling out and then the birds could also have a place to perch again. 

   
 So far this seems to be working and no squirrels have gotten in yet this year. I’ll probably get a new feeder eventually, I just like to reuse if I can and I was afraid they would just ruin a new feeder too.  Bird feeders aren’t exactly cheap! Hopefully everyone can coexist peacefully this year. 😉 

P.S. We’re in Portland, OR right now on vacation for my birthday today so I’ll probably be posting pictures next time!


Perler Bead Card 


So every year for the past few years I have been making my own cards for my uncle’s birthday because I can never find good uncle cards. I’m close with my uncle and they’re all so impersonal! I had an idea to use perler beads, I used to make things with these as a kid. You just iron the design!    I attached it to card stock and stamped the “happy birthday.” I got the design from Makeandtck on iconosquare. I forgot how much fun these little beads are and I’ll have to come up with some more projects for them!  Also here is the  embroidered card I made last year.


I joined the Air plant club

DSC_0006

I’ve actually been wanting an air plant for a while after seeing them all over Pinterest. One of my friends bought some at the Renegade Craft Show in Chicago last summer and while one died she said the other one was pretty easy to care for after she got the knack for it.

According to articles I’ve read the best way to care for them is to submerge the actual plant in a glass of filtered water for a couple hours and let dry on a paper towel after that. Do this once a week or so. I’ve had mine for a couple weeks now and this seems to work so far.

DSC_0004

If you are new to air plants they don’t need soil because they don’t have roots. They get their nutrients from the air. (hence the name)  They like bright but filtered light best so as long as you keep this in mind they are extremely easy and fun to display. The possibilities. Are endless and here are some fun examples I found on Pinterest from Centrogarden, Buzzfeed, and Decoist.

I put mine in a little terrarium with some sphagnum moss and fish rocks. The glass ornament is from Joann’s. I bought it last winter after Christmas on sale. I’m going to hang it with jute and hang it up somewhere.

IMG_3719

DSC_0001