Crockpot Applesauce

dsc_0080

Hey, have you missed me? I’ve been trying to get the motivation to write a post, even thought it really doesn’t take that much time at all.  Sometimes when I  have a million other little things to do, I put things off even the things I enjoy doing.  Since I graduated in July, I have been busy wedding planning, job searching and taking care of some sick family members in Indiana, so needless to say I’ve been busy.

I’m posting this recipe for multiple reasons.  One, its super easy, two its healthy, and three it’s so easy I can’t believe I’ve never made it before!

I love anything that I can throw in a crockpot while I do other things.  Bonus: it smells amazing!

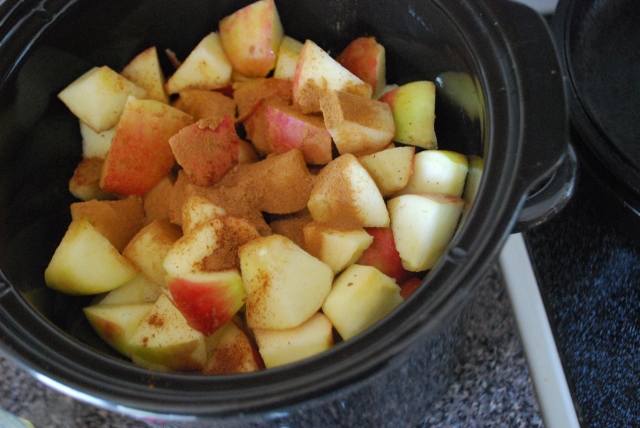
Here is what you need:

  • 6-8 Apples, diced (with or without skins)
  • 1/2 cup water
  • 1 tsp. cinnamon

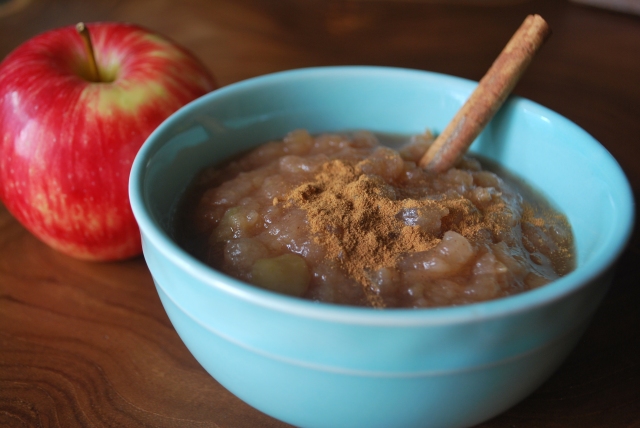
Add all ingredients to the crockpot and cook on high for 2 hours or low for 4 hours.  I chose to leave the skins on my apples for fiber, but if you do this I would recommend blending it in small portions in a blender.  If not, and especially if you like it chunky like I do I would just use a hand masher.  I did this and while it was good, the skins were a little much.

dsc_0069

I got the original recipe from The Healthy Maven Blog and tweaked it a bit to fit my preferences and crockpot size.  Homemade applesauce is tastier than store bought and so cheap and easy to make, it would be a great healthy snack for kids.  I love it because its a sweet snack with no added sugar.

Enjoy!

img_3719


Advertisement

Concrete Pumpkin

DSC_0054

Happy Halloween!  Halloween is my favorite holiday and I have one more pumpkin diy to share. I wanted to make this last Halloween but just ran out of time so it was definitely on my list this year.  The Concrete Easter Eggs were my first experience with concrete and it was pretty easy so I was pretty excited.  Also I did some research and I guess cement and concrete are not the same.  Cement is  an ingredient of concrete. Concrete is a mixture of aggregates and paste. So Concrete is stronger and will last much longer.  The original idea is on the blog Fox Hollow Cottage.

DSC_0013

First cut a hole and and design you want on the pumpkin with a knife. This one was a light I got at Goodwill so it already had a face and a hole in the bottom.

Next put plastic wrap tightly around the face so the concrete won’t leak out. Turn in upside down and spray the inside with cooking spray. I forgot this stepsons mines isn’t stick too bad but I would recommend using spray. I put my pumpkin I. A bucket to get it to stay upside down while I poured the concrete in. The concrete I used was Quikrete from Home Depot.  

  If you’ve never mixed concrete it’s pretty easy. Some people add the powder to the water, I like to add water gradually to the powder while I stir. Only add a little water at a time until you get an even and thick but pourable consistency.

Let the pumpkin sit for at least 24 hours after you pour the concrete.

When you cut the foam pumpkin off use a knife, scissors, and a screw driver came in handy for prying pieces off.

When I took my pumpkin off the eyes and eyes didn’t fill in all the way so I mixed some more concrete up in a cup and speckle some on to make them bigger and more triangular. It doesn’t have to be perfect though. The cracks and rough spots are what makes the concrete pumpkin interesting!

DSC_0056

Show me your costumes in Instagram by using #peppermintsandhoneybees. Now go get your spook on!

Pumpkin Terrarium

DSC_0019

When I was in elementary school I always secretly loved projects where I got to make dioramas. I’ve always loved miniatures and love making little scenes. So when I found some pictures on Pinterest here and here that combined my love of dioramas with my love for Halloween I knew what I had to do!  I found the foam pumpkin at Goodwill. Someone had tried to carve what sort of looked like a castle and gave up so I buggy it and just cut a big hole out where they had started carving. Of course you can just by a new foam pumpkin from any craft store in the fall. Just make sure it’s the hallow carve-able kind!

I chose to spray paint the inside black as shown below but it’s totally up to you what you want the inside to look like.

DSC_0389

I used rocks, sticks and different kinds of moss for the terrarium.  The moon and stars are glow-in-the-dark stickers and the fox is a little figurine from Joann’s.  Finding things to put in is half the fun!  I’m still on the hunt for very tiny battery powered led string lights that I can attach the the top inside to shine light down on my scene.  It’ll be fun to switch things around every year.  Now get to crafting!

IMG_3719

DSC_0018

Lace T-shirt Redo

Hello all I hope your are enjoying the beginnings of fall!  Sorry for the long absence.  As you may or may not know, I started grad school At Columbia College in Chicago and to say that it is taking up most of my time would be an understatement!  So…if my posts are far and few between lately you will know why.  No fear though, I’m still here and still blogging, I just don’t have as much free time to diy.  Any ways I have this t-shirt DIY that I actually made quite a while ago and just never got around to posting.  It’s quite simple if you have a sewing machine and a shirt you don’t mind ripping apart.  I got the idea from this awesome diy blog Trash to Couture.

DSC_0014

All you need is:

  • a t-shirt
  • seam ripper
  • sewing machine plus pins, scissors etc.
  • lace or crocheted trim.  (Mine is from Joanne’s Fabric)

First cut the very edge off of the sides of the shirt including the sleeves.  Don’t cut too deep, you want your shirt to still cover you.  measure out how much trim you will need before you but it.  Mine took about 3′ for both sides.  you want to lay the open shirt out and measure from the bottom of the front to the bottom of the back.  after you buy your trim pin in onto the shirt edge and sew it in place.

DSC_0021

Next you want to sew the front and back together again but remember to leave a whole for your arm.  I would leave a good sized hole so the shirt flows. And there you go!DSC_0022

IMG_3719

Egg Drop Soup

I may have found my new favorite recipe for the fall/winter.  It’s been unseasonable cold here for November and last night soup was the perfect thing for dinner.  I have been wanting to try to make my own egg drop soup since it’s one of my favorites but usually made with chicken broth. I didn’t think it would be this easy and fast, or good though!DSC_0020

  • Bring 3 cups of vegetable stock with a couple pinches of salt to a boil on the stove
  • chop up carrots, shitake mushrooms and green onions and add to soup
  • combine 1 tablespoon of cornstarch with 2 tablespoons of water in a small bowl and add to soup.
  • half scramble 1 egg in a bowl and add it a little at a time to the boiling soup

Once you add the egg your soup is done and ready to eat, it’s that easy!  I added a little liquid aminos to mine for taste also.  Soy sauce also works.  Enjoy!

IMG_3719

Vegetable Bean and Lentil Stew

DSC_0062

It’s been raining here by Chicago all week and with the dreary cold weather it’s starting to feel more like fall.  I decided it was time to make my Vegetable bean and lentil stew for dinner.  I call it this because it’s the best name I can think of because I pack it full of all kinds of good stuff.  I never measure stuff out when I cook so it comes out a bit different every time but I’ve tried to put together a recipe if anyone wanted to try it for themselves.

Usually I use a little of whatever beans and lentils I have in our pantry.  For this batch I used:

  • Black beans, pinto beans, great northern white beans, and lentils.  Use enough of whatever your mix is to fill the crock pot up 1/4 of the way.  Fill it up with vegetable stock so its up above the beans about an inch fill with water about three more inches.  I add 1 Tablespoon of chopped garlic and about 1/3 cup of chopped onions.  I use a pinch or two of salt and some thyme.
  • Here is a picture of everything else I added.  Also not pictured, kale and onions.  I let the beans and lentils cook for a bout an hour or two first before I add everything else.

DSC_0035DSC_0017Next I chop up a few carrots, stalks of celery and two or three potatoes.  I add a handful of kale and let let simmer until everything is cooked.  Usually a couple more hours.  I let it cook all day to let the flavors cook in.  It’s good for a Sunday around the house.  It makes quite a bit so you’ll have leftovers too!

enjoy!

IMG_3719

Painted Wooden Bangles

IMG_4173.JPG

IMG_4166.JPG

Wow, has it really been a month since I posted anything? Bad Jenna, bad! I have been working on things but not to completion I guess. I’ve been busy working and doing other fun things such as the Renegade Craft fair in Chicago, here’s their link. They do shows around the county and in London. It’s like etsy only not online! I had said that this was the year I’d finally have a booth but once again I chickened out. Boo me! But I did go to shop and like always it was amazing with amazing people making amazing art, jewelry, pottery, clothing and other goods. I also went to the Chicago riotfest this past weekend and rocked out! This was the third year in a row that Ben and I went and like always it was packed with awesome bands! Here’s the lineup if you were curious. Riotfest is in Denver this weekend.

IMG_4107.JPG

IMG_4102.JPG
I got a pretty good spot for Metric, one of my favorite bands and here’s one of Ben and I waiting for Social Distortion to start.

IMG_4193

Any who like I mentioned one of the things I’ve actually finished recently was these two wooden bracelets I painted and then sprayed with a clear coat for protection. I’ve been really into all the constellation accessories I’ve been seeing lately and wanted to make my own take on the trend. And the triangles are just one of my favorite color pallets. It’s very summery because I guess I’m sad I see summer leave so soon. I love fall, don’t get me wrong but summer and I have a special relationship and goodbyes are always hard!

Well forgive me for the time gap and I’ll try to post more. Let me know what projects if any I should try out!

IMG_3719.JPG