Dried Wedding Flower Ornament

Happy Holidays everyone! I have a really easy but special DIY for this Season. And of course they don’t have to be from a wedding bouquet but these are from my wedding which was last June.

I wanted to preserve a bit of my flowers but I don’t want them in a shadow box because I had hydrangeas and things with tiny parts that would just fall apart anyway.

I don’t know how many years they will keep but they should last at least a few years.

All you need is some clear glass ornaments and dried petals and leaves. Be careful when placing everything in the ornaments because they are very thin glass and you don’t want it to break and cut you. It’s that easy! If you don’t celebrate Christmas and/or have a tree they would look great handing from ribbon in a window or from a shelf also.

I added some of my wedding pictures also, since I realized I never shared them on here last summer.

Have an amazing holiday season!

Spider Mobile

So I know I’ve been pretty m.i.a. for a while.  The truth is that I just didn’t feel like blogging really.  I’ve been focusing on my art and other things for the past year. (Oh yeah I got married this summer! More on that later.)  I just didn’t want my blog to become a chore that I dreaded, so if I didn’t have anything to blog about I didn’t.  I’m ready to post more here and there and I actually do have some stuff to share.  So, in honor or my favorite holiday Halloween I present to you:

Duh duh duh! A spider Mobile.  I actually made this last year after Halloween.  I bought the spiders and mobile for way cheap the day after Halloween and made it.  So this year is the first Halloween I’ve put it up.  I got the idea from Better Homes and Gardens magazine’s Halloween Tricks and Treats magazine 2015. I had wanted to make it back in 2015 but it took me forever to find some plastic spiders that weren’t attached to rings.  Last year I finally did so here you have it.

You’ll need:

  • 200 or more plastic spiders
  • a wire rimmed spider web
  • fishing line
  • a needle or something sharp to pierce spider butts
  • optional- I tied little seed beads to the end of my strings for a little weight so they hang straight

Its pretty easy just pierce a whole in the abdomens of all the spiders and make different length strings with them spacing them about 5-6″ apart and tying a knot in the fishing line under each spider.  I finished each string with a clear seed bead under the last spider for a little weight.

After you have your strings tie them all on the spider web strands.  You might want to do this as you finish the strings to so they are out of the way and don’t get tangles up.

The last step is to tie string onto four sides of the web so that it hangs horizontally from the ceiling.  (most are made to hang vertically)

And there you have it!  Perfect for a Halloween party or I guess all year round if you really like spiders, I don’t judge!

On a side note, when storing this I put each string of spiders in it’s own individual baggie so the strings don’t get tangled beyond saving.  Next year you will really appreciate it.

Enjoy!

img_3719


Crockpot Applesauce

dsc_0080

Hey, have you missed me? I’ve been trying to get the motivation to write a post, even thought it really doesn’t take that much time at all.  Sometimes when I  have a million other little things to do, I put things off even the things I enjoy doing.  Since I graduated in July, I have been busy wedding planning, job searching and taking care of some sick family members in Indiana, so needless to say I’ve been busy.

I’m posting this recipe for multiple reasons.  One, its super easy, two its healthy, and three it’s so easy I can’t believe I’ve never made it before!

I love anything that I can throw in a crockpot while I do other things.  Bonus: it smells amazing!

Here is what you need:

  • 6-8 Apples, diced (with or without skins)
  • 1/2 cup water
  • 1 tsp. cinnamon

Add all ingredients to the crockpot and cook on high for 2 hours or low for 4 hours.  I chose to leave the skins on my apples for fiber, but if you do this I would recommend blending it in small portions in a blender.  If not, and especially if you like it chunky like I do I would just use a hand masher.  I did this and while it was good, the skins were a little much.

dsc_0069

I got the original recipe from The Healthy Maven Blog and tweaked it a bit to fit my preferences and crockpot size.  Homemade applesauce is tastier than store bought and so cheap and easy to make, it would be a great healthy snack for kids.  I love it because its a sweet snack with no added sugar.

Enjoy!

img_3719


Hello Again!

Hello remember me!?  I know it’s been a looooong time since I’ve posted anything and the reason was because I was going to school full time and working on my installation art and this hasn’t left me too much time to craft or bake or anything like that.  Not to worry though, I am almost done with school and have some awesome projects lined up to try and post about!!

If you want to see what I’ve been up to in my art I just made a new website that you can check out at jennamishler.com and let me know what you think!

I might not always get around to posting as much as I would like to but rest assured I will always get around to posting projects eventually.

Cheers,

Jenna

Chocolate Peppermint Marshmallows

  
Happy Holidays everyone! I have two parts to this post. First of all I would like to announce that Ben and I are engaged! So actually we have been since the first of November but I was waiting to make it official until we told all of our family and friends in person. Also I didn’t have my ting yet, but anyway yes, this is my good news!    
Now on to the absolute easiest Christmas treat recipe you’ll ever find. For these easy chocolate peppermint marshmallows you will need:

  • Dark chocolate or semi sweet chips
  • Crushed up peppermints or candy canes
  • Large marshmallows (I used my favorite vegan brand Dandies

Just melt your chocolate chips in a double boiler or the microwave. (30 seconds at a time) Then dip half of each  marshmallow in the melted chocolate. Next press the chocolate top down into a bowl of crushed mints and put on wax paper to dry. It’s that easy! 


Christmas DIY Roundup

Hey all, remember me? Ah I just realized I haven’t posted since October!  The reason being grad school is keeping me super busy.  But even though I have been working on my art more than crafts I still want to spread some holiday cheer so I found a couple of my favorite diy’s I posted last Christmas time for a little refresher.

First there are these super fun and easy to make Snow Globes

DSC_0076


Next the ever amazing Dyed Bottle Brush Trees and Wreath

DSC_0015

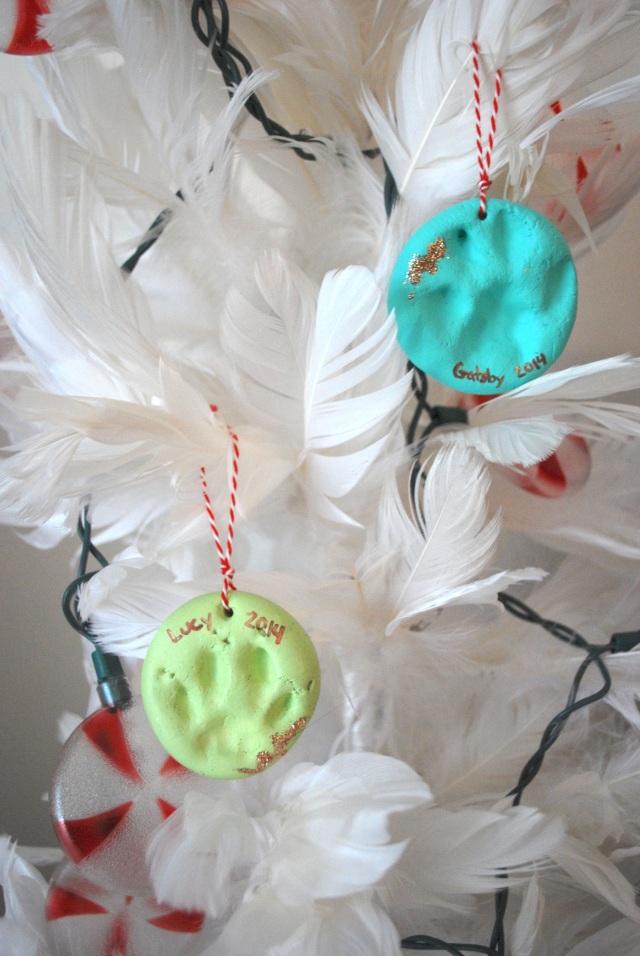
And last but not least…Clay Paw Print Ornaments

DSC_0023

I hope these give you some inspiration and fun and I’d love to see what other Christmas diy’s you come up with so show me on Instagram with #peppermintsandhoneybees.  Also I have an exciting announcement to make soon so stay tuned!!!

IMG_3719

Concrete Pumpkin

DSC_0054

Happy Halloween!  Halloween is my favorite holiday and I have one more pumpkin diy to share. I wanted to make this last Halloween but just ran out of time so it was definitely on my list this year.  The Concrete Easter Eggs were my first experience with concrete and it was pretty easy so I was pretty excited.  Also I did some research and I guess cement and concrete are not the same.  Cement is  an ingredient of concrete. Concrete is a mixture of aggregates and paste. So Concrete is stronger and will last much longer.  The original idea is on the blog Fox Hollow Cottage.

DSC_0013

First cut a hole and and design you want on the pumpkin with a knife. This one was a light I got at Goodwill so it already had a face and a hole in the bottom.

Next put plastic wrap tightly around the face so the concrete won’t leak out. Turn in upside down and spray the inside with cooking spray. I forgot this stepsons mines isn’t stick too bad but I would recommend using spray. I put my pumpkin I. A bucket to get it to stay upside down while I poured the concrete in. The concrete I used was Quikrete from Home Depot.  

  If you’ve never mixed concrete it’s pretty easy. Some people add the powder to the water, I like to add water gradually to the powder while I stir. Only add a little water at a time until you get an even and thick but pourable consistency.

Let the pumpkin sit for at least 24 hours after you pour the concrete.

When you cut the foam pumpkin off use a knife, scissors, and a screw driver came in handy for prying pieces off.

When I took my pumpkin off the eyes and eyes didn’t fill in all the way so I mixed some more concrete up in a cup and speckle some on to make them bigger and more triangular. It doesn’t have to be perfect though. The cracks and rough spots are what makes the concrete pumpkin interesting!

DSC_0056

Show me your costumes in Instagram by using #peppermintsandhoneybees. Now go get your spook on!

Terrarium Lamp

terrariumlamp

I’ve been eyeing this old lamp at a local used furniture store for over a year now, and after it was still there the last visit I decided to make what I had planned for it. Also I got it for $1 and full of rocks!!! I already had the moss and driftwood. I bought fake succulents from Hobby Lobby; 1 because how would I water them and 2  even if I could um…I don’t want to electrocute myself. I spray painted a couple brass parts that had lost their shine with Rust-o-leum Metallic in gold.

DSC_0009

It was a little difficult to fill because it opens from the bottom and the bottom doesn’t detach completely since it’s attached to the wiring.  I had to fill and kind of shake and roll it around to get things where I wanted but I’m pretty happy with how it turned out.  The lamp shade is from Target.  Show me what all you have made terrariums out of!

IMG_3719

DSC_0035

Pumpkin Terrarium

DSC_0019

When I was in elementary school I always secretly loved projects where I got to make dioramas. I’ve always loved miniatures and love making little scenes. So when I found some pictures on Pinterest here and here that combined my love of dioramas with my love for Halloween I knew what I had to do!  I found the foam pumpkin at Goodwill. Someone had tried to carve what sort of looked like a castle and gave up so I buggy it and just cut a big hole out where they had started carving. Of course you can just by a new foam pumpkin from any craft store in the fall. Just make sure it’s the hallow carve-able kind!

I chose to spray paint the inside black as shown below but it’s totally up to you what you want the inside to look like.

DSC_0389

I used rocks, sticks and different kinds of moss for the terrarium.  The moon and stars are glow-in-the-dark stickers and the fox is a little figurine from Joann’s.  Finding things to put in is half the fun!  I’m still on the hunt for very tiny battery powered led string lights that I can attach the the top inside to shine light down on my scene.  It’ll be fun to switch things around every year.  Now get to crafting!

IMG_3719

DSC_0018