Record Table

20140705-113540-41740789.jpg

20140705-113541-41741721.jpg

Happy Fourth of July everyone! I hope you all are having a great weekend and got to see some fireworks and some friends and family.

So I’ve seen these easy side tables made with a plant stand and old records and thought I’d make one for a birthday present for a birthday coming up. I bought the plant stand at Menards and I think I got my records from good will. I’ve had them a while waiting to make things with them.

When I got home the opening to the
Plant stand was a little wider than I had planned on it being but I made it work by just gluing the three prongs that stick up. I used e6000 glue and so far it is holding. The records were a little flimsy so I used two glued together do that it could hold more. So far so good!

Also we went into Chicago yesterday to see some friends and watch fireworks at Navy Pier so here are a couple pictures from our fourth!

20140705-114507-42307663.jpg

20140705-114509-42309377.jpg

20140705-114508-42308312.jpg

20140705-114510-42310490.jpg

20140705-114552-42352188.jpg

Jenna ♥️

Colander Hanging Basket

20140623-114819-42499690.jpg

Hi everyone, I hope you’re all having great Summers so far!  Sorry it’s been so long since I posted anything, I was in Indiana visiting family and friends and have been busy doing typical Summer things like weddings, garage sales and so on.  I’ve also been trying to beautify my outdoor spaces as well so I thought I’d share this DIY colander hanging basket.  It’s pretty easy and I’ve been meaning to make it for a long time now I just needed to acquire a metal colander.  I was helping a friend have a garage sale this weekend and she had an old colander that she let me have in return so voila!

all you need is:

A colander

Dirt

Plants of your choice

Chain plus S hooks to stick either in the colander holes or around the handles

And another hook for the top

my supplies

my supplies

I actually found a hanging basket chain kit at Walmart, it was in the chain and rope section.  I had to bend the S hooks to get them to fit but all in all it was very easy.

Before the chain

Before the chain, I made a mess!

Plus the colander is perfect since the water drains right though the holes!

Happy making!  Let me know what other found objects you have used to put plants in.

Jenna ♥


DIY Stone Necklace

20140518-210235-75755967.jpg

20140518-210237-75757896.jpg

It’s much shinier in real life. I couldn’t really get a good picture of it glistening.

20140518-210236-75756990.jpg

Hello everyone! I hope you’re all having a freak weekend, if only it could be a little longer.

For this weekends DIY I made a necklace. I kinda stumbled onto this one. I was outside on my patio looking at the stones around the landscaping when I found a particularly sparkly crystal-like one and got the idea to make something with it. I modpodged gold leaf onto the back after I cleaned the dirt off with water and a toothbrush. Actually I would recommend gold paint to liquid gold leaf instead but I didn’t have any.

I then wrapped it in gold wire and put it on a chain. I like the way it looks but I think I might add some beads or charms later. It’s a start. I’d like to find different rocks to try it with also.

Let me know what found objects you have made into jewelry!

Jenna ❤

DIY Hummingbird Feeder

20140511-200212.jpg 20140511-200158.jpg 20140511-200134.jpgI’m so excited for warm weather finally and cannot wait to decorate my patio since this is the first summer we have had one in about 4 years.  I want it as nature friendly as possible. (partly because I like to watch my cats freak out at birds and other animals!)  I made this hummingbird feeder very easily with just a red bottle, copper colored wire and a special hummingbird feeder that I bought off of amazon.  The color of the bottle doesn’t have to be red but I know they are attracted to red so I figured it wouldn’t hurt.  I bought my bottle from Pier One.  I just wrapped the wire around the bottle, making sure it was secure and made a loop at the top to hang it from.

I also have a recipe to make your own nectar as well.

1 cup sugar

4 cups water

boil water and sugar until melted.  Cool and fill the feeder.  You can store the rest in an empty container.

I haven’t seen any hummingbirds yet but I think it’s a little early in the year for them to migrate north yet.  I can’t wait to see them!

Jenna ♥


DIY Photo Phone Case

DSC_0279

Hello everyone, I have been busy trying to get things done so I can enjoy the warm weather that is finally starting to arrive soon!  I haven’t really made anything in about a week but I thought someone might find this diy handy.

This one’s pretty simple!  Buy a clear case for your phone.  I got this one on Amazon for about $1.99.  Print out a 4×6 photo, of whatever, and trace the phone cover and camera hole and cut.  I have an Iphone so depending on your phone you might need a bigger sized picture so be sure to measure first.  I used an exacto knife to make sure I got a nice clean line and voila! Try to use a photo that will work well with your case since it is long and skinny.  This is perfect for those of you who like to change your case often and don’t want to spend a small fortune on new cases every time.

20140406-131034.jpg

DSC_0281


How to upgrade a plastic hanging basket

So I’ve had this plant for about four years now which for me is an eternity!  I definitely do not have a green thumb, most of my plants die right away, but this little guy has been able to survive me so far.  I kept it in the plastic basket it came in because I was too scared to re-pot it but hated the way it looked in my house.  I figured a simple fix would be to take the plastic hanger off, drill four holes evenly spaced around the top of the rim and string twine though to hang, and it made such an improvement with very little cost and no replanting, yay!

20140316-194013.jpg

Headboard DIY with cardboard

I have been wanting a headboard for our bed since we bought it a few years ago but have limited space to make one, and well you know how I feel about buying things I can easily make!  I came across this tutorial from http://james-michelle.blogspot.com/2012/01/30-diy-headboard.html?m=1 on pinterest.  It uses a cardboard form instead of wood, making it easy, cheap, and replaceable.  Plus no power tools required!  If you have one big piece of cardboard this is best but if not you can tape two together with packing tape.  Here are the materials and tools I used:

  • cardboard
  • 2 yards of quilting batting
  • 2 yards of fabric
  • packing tape
  • staple gun
  • utility knife
  • heavy duty scissors (optional)
  • ruler or measuring tape

Also note my bed is queen sized so you might need more if you have a king sized bed.  I was going to buy some of the cardboard used for science fair projects but then Ben ordered some floor mats for his car and the box was the perfect size, score!  I bought the batting and fabric at Joanne’s Fabric store.  Both were on sale, and I used a 50% off coupon on the batting bringing the total to around $14. I recommend using thick quilting batting if you can.

If you didn’t know all the large craft stores like Joannes, Michaels, and Hobby Lobby have coupons every week. I use the apps on my phone but you can look it up and print it out if you don’t have a smart phone.  I never shop these stores without coupons.

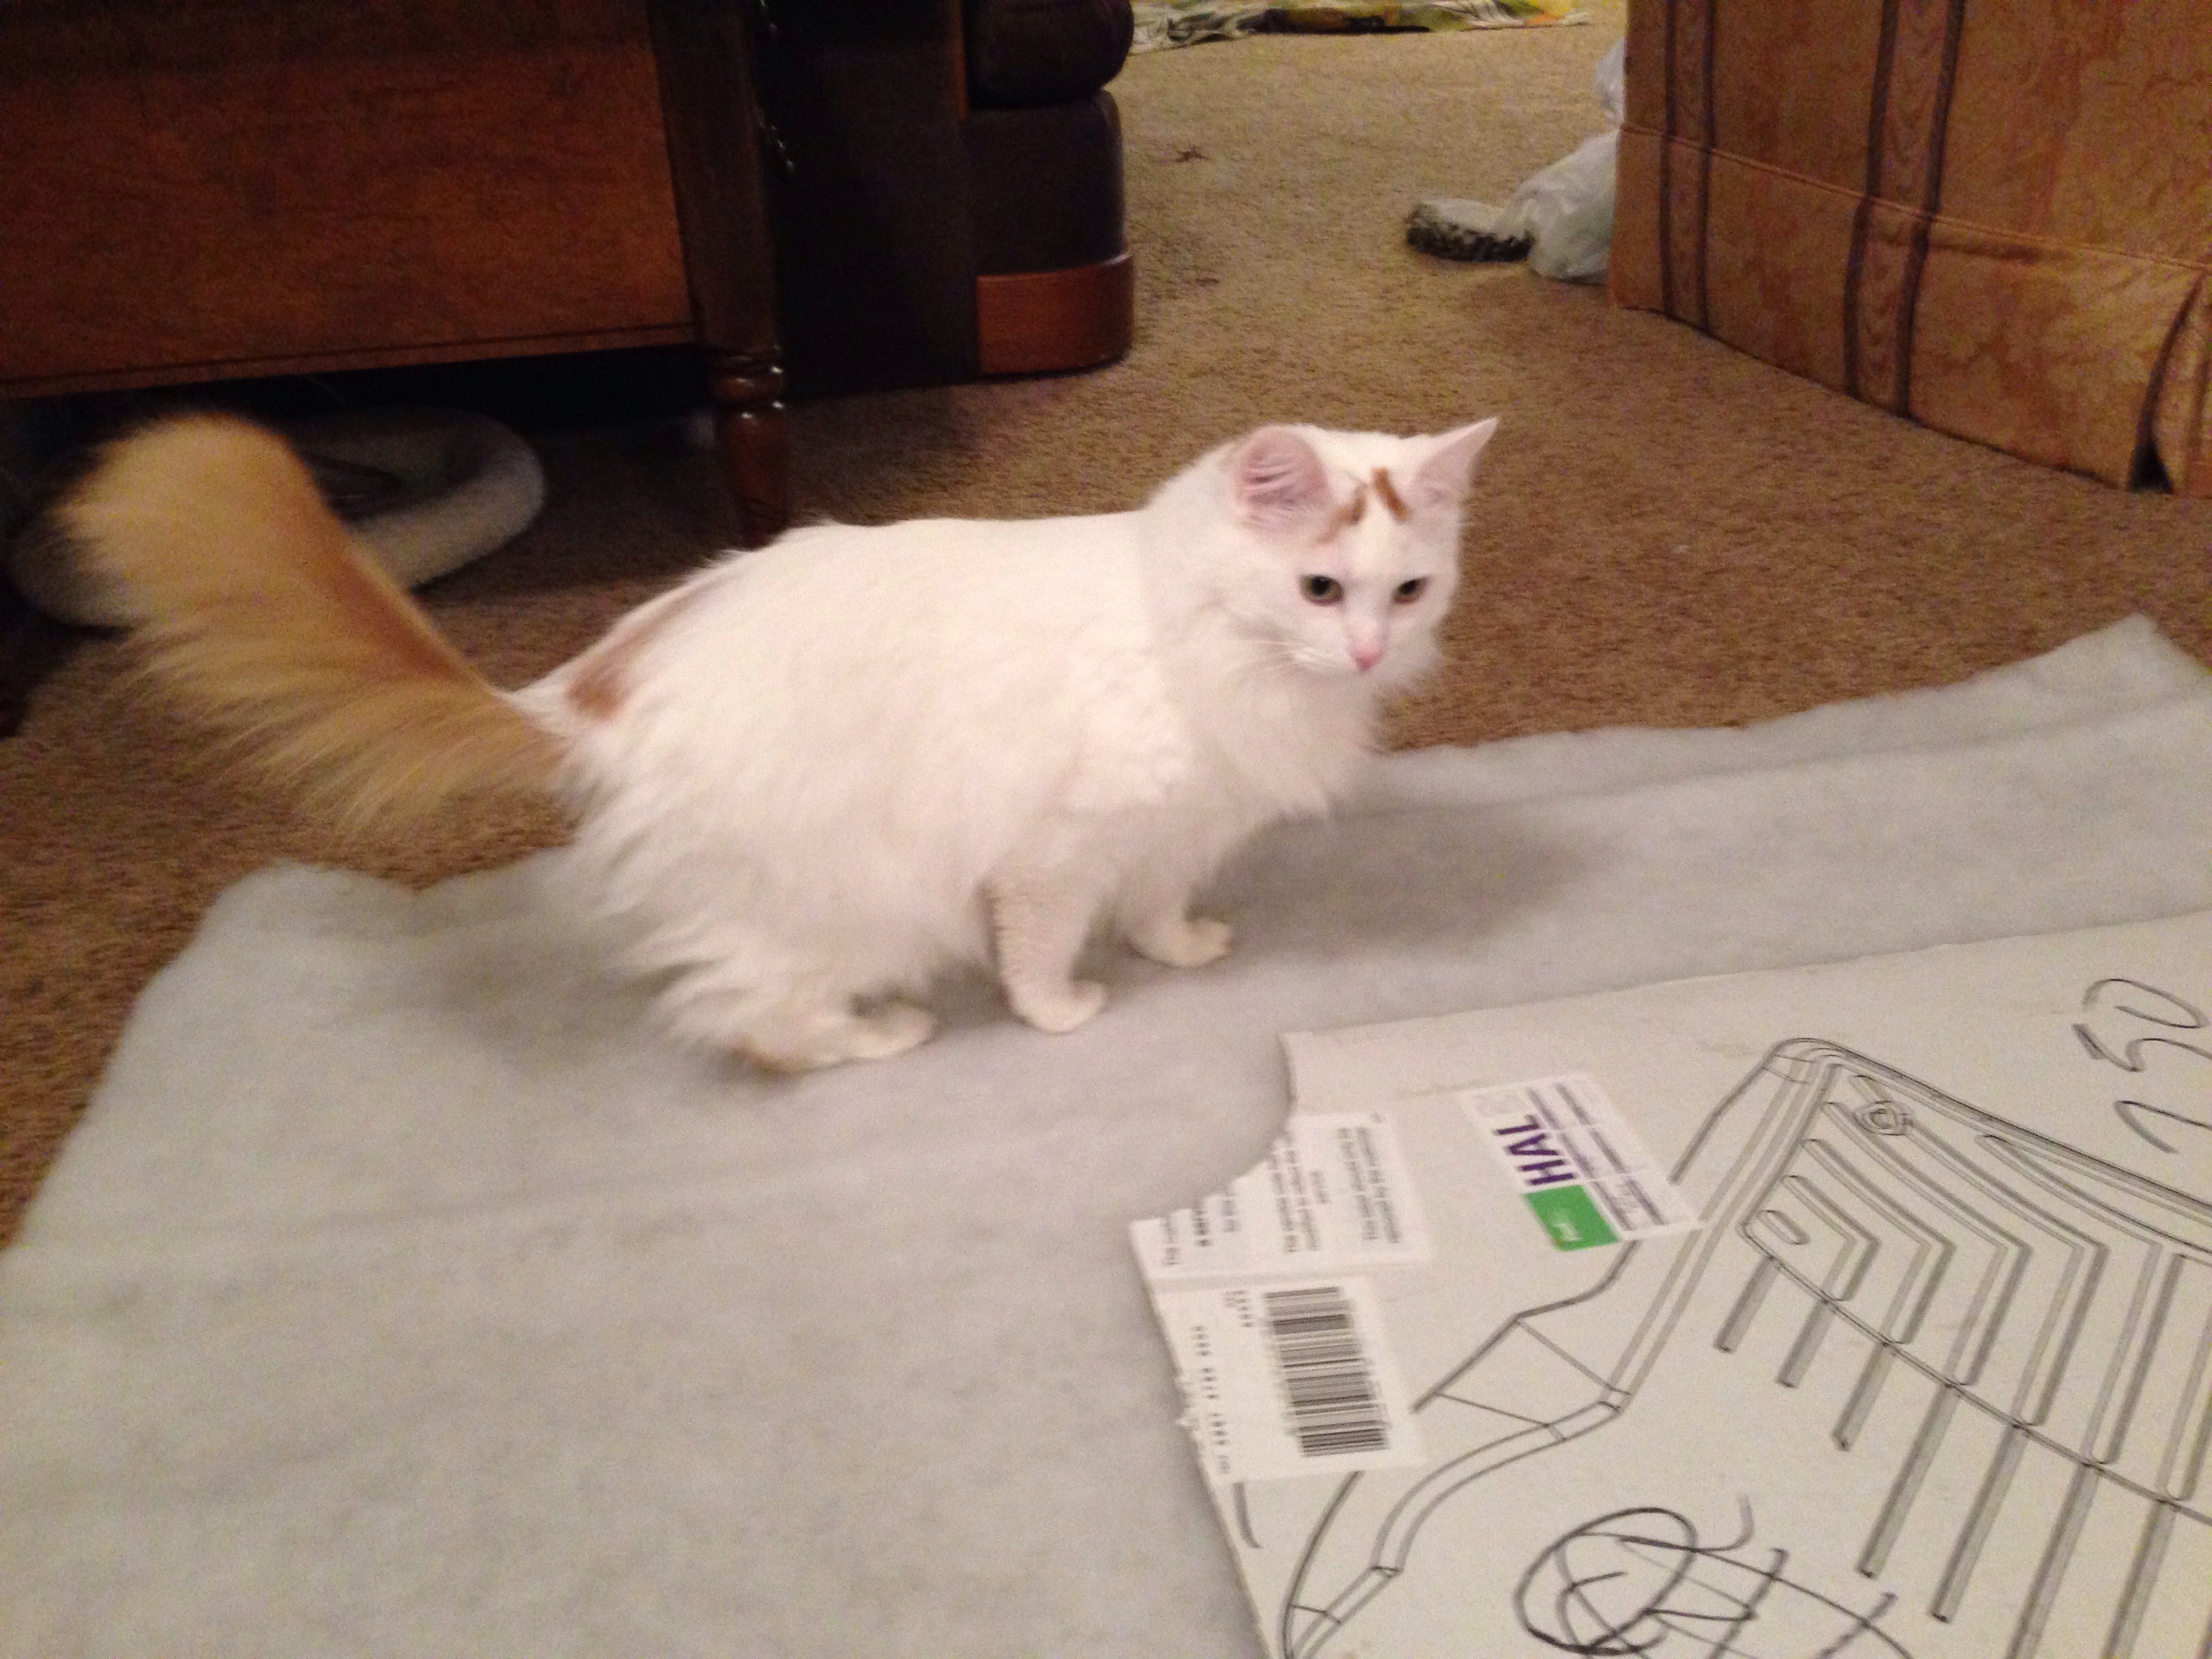
The tutorial I followed suggested using bowls to make the different curves so they come out even and perfectly round.  I used a pen to make the shape and cut it out using a utility knife and heavy duty scissors.

I had to tape the top curve on because I didn't have enough at the top, but that's ok, it'll get covered up.

I had to tape the top curve on because I didn’t have enough at the top, but that’s ok, it’ll get covered up.

Next I put the batting under the  cardboard and taped and stapled it up around the cardboard.  I stapled and then taped the edges to the cardboard so they would be secure.  Then I repeated these steps with the fabric, making sure the fabric was tight in the front with no tucks and folds.  I cut off the extra on both the batting and fabric so that there were about three inches to fold over before I covered the cardboard.

I had a helper

I had a helper

After I was done I used those clear mirror hooks to attach it to the wall, and ironed it.  The best part about making a cheap headboard is that if we get a new duvet or change bedroom colors the fabric can be easily replaced.

Here is the finished product.  I need to do some more ironing, but I think it turned out pretty decent for about an hour of work and $14.  Lucy seems to approve!

now for some more wall art.

now for some more wall art.