Happy Halloween! Halloween is my favorite holiday and I have one more pumpkin diy to share. I wanted to make this last Halloween but just ran out of time so it was definitely on my list this year. The Concrete Easter Eggs were my first experience with concrete and it was pretty easy so I was pretty excited. Also I did some research and I guess cement and concrete are not the same. Cement is an ingredient of concrete. Concrete is a mixture of aggregates and paste. So Concrete is stronger and will last much longer. The original idea is on the blog Fox Hollow Cottage.
First cut a hole and and design you want on the pumpkin with a knife. This one was a light I got at Goodwill so it already had a face and a hole in the bottom.
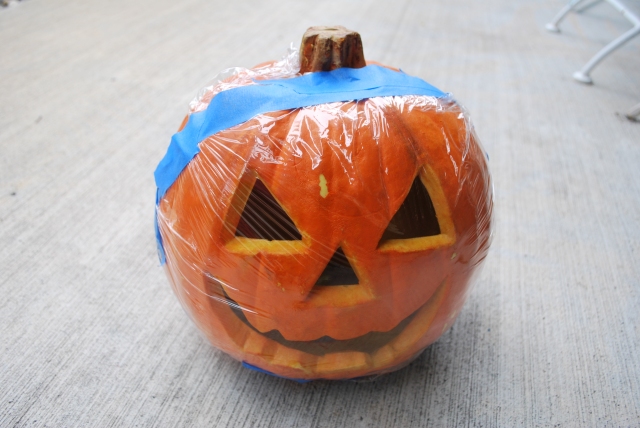
Next put plastic wrap tightly around the face so the concrete won’t leak out. Turn in upside down and spray the inside with cooking spray. I forgot this stepsons mines isn’t stick too bad but I would recommend using spray. I put my pumpkin I. A bucket to get it to stay upside down while I poured the concrete in. The concrete I used was Quikrete from Home Depot. 
 If you’ve never mixed concrete it’s pretty easy. Some people add the powder to the water, I like to add water gradually to the powder while I stir. Only add a little water at a time until you get an even and thick but pourable consistency.
Let the pumpkin sit for at least 24 hours after you pour the concrete.
When you cut the foam pumpkin off use a knife, scissors, and a screw driver came in handy for prying pieces off.
When I took my pumpkin off the eyes and eyes didn’t fill in all the way so I mixed some more concrete up in a cup and speckle some on to make them bigger and more triangular. It doesn’t have to be perfect though. The cracks and rough spots are what makes the concrete pumpkin interesting!
Show me your costumes in Instagram by using #peppermintsandhoneybees. Now go get your spook on!


